Windows Server 2016: 5 Things You Need to Know

On October 12th, Microsoft released their latest server operating system – Windows Server 2016. To ensure your success, we’ve gathered a list of the top 5 things you need to know.

We’ve been preparing for Windows Server 2016 for the past couple months, and even attended Microsoft Ignite a few weeks ago, to make sure we’re up to date on all the latest and greatest news.

While TechNet has already published a “What’s New in Windows Server 2016” article, at ConnectWise we want to take you a bit deeper and call out a few things technology solution providers like you should be aware of.

Patching

Windows Server 2016 continues Microsoft’s move to deployment rings. Windows 10 introduced 6 deployment ring options spread across 3 phases (also known as servicing branches):

Insider – 1 ring
Current Branch (CB) – 2 rings
Current Branch for Business (CBB) – 3 rings
Then, enterprise customers wanted an even slower option, so a special edition of Windows 10 was released called Windows 10 Enterprise Long-Term Servicing Branch (LTSB) – which essentially added a fourth phase / seventh deployment ring.

With Windows Server 2016, the installation option you choose will determine which servicing branch you default to. Server 2016 with Desktop Experience and Core will both default to the LTSB, which is great for reducing problems in a production environment. Just be aware that the LTSB won’t include certain things, like Edge browser.

Nano

There’s been a ton of hype about the Nano Server option. But before you start spinning them up in production, you should know that Nano Servers don’t use the LTSB (see above). Instead, they default to the CBB, which means more frequent patches (CBB is Phase 3. LTSB is Phase 4).

Given some recently reported issues with the Windows 10 Anniversary Update, we’ll let you decide whether this is a good idea or not for your business and clients. Also, it’s important to note that Nano Servers requires Microsoft Software Assurance.

Licensing

Speaking of Software Assurance, you may have noticed that Supermicro Servers are changing how they license certain editions of  server options, just like the Microsoft Windows Server 2016.

Back in 2013, Microsoft introduced core-based licensing because processors weren’t a precise enough measure (since each processor can have a varying number of cores). Though, you could still get Datacenter and Standard editions under the processor-based licensing model.

Starting with Server 2016, processor-based licensing is no longer available for Datacenter and Standard edition. If you were lucky enough to renew your Software Assurance agreement recently, this won’t apply to you until renewal.

Even then, during renewal, you’ll get 16 core licenses for each applicable on-premise processor license and 8 core licenses for each service provider processor license.

Containers

On the plus side, if you opt for Datacenter or Standard under the core-based licensing model, you’ll now be able to use one of the most talked about features of Server 2016 – containers!

For anyone that’s not familiar with containers, Microsoft considers them “the next evolution of virtualization” and they come in two flavors:

Windows Server containers
Hyper-V containers
With either of the core-based editions for Server 2016, you can run unlimited Windows Server containers by sharing the host kernel. If that’s a security concern for you or your clients, then you’ll want to use Hyper-V containers to isolate the host’s kernel from each container.

Just know that unlike Windows Server containers, you can only run 2 Hyper-V containers on each Standard edition server. If you want unlimited Hyper-V containers, you’ll need Datacenter edition. But whichever choice you make, both types of container can work with Docker.

Windows Defender

When upgrading to Windows Server 2016 from a prior version with antivirus installed, you may run into problems. That’s because the upgrade process installs and enables Windows Defender by default.

Luckily, whether the user interface is enabled or not (which seems to depend on edition), there’s a quick PowerShell command you can run to disable Windows Defender entirely:

Uninstall-WindowsFeature -Name Windows-Server-Antimalware

(Bonus) Modern Lifecycle Policy

While not directly related to Windows Server 2016, here’s a bonus that partners should be aware of: Microsoft has announced their new Modern Lifecycle Policy. For now, this policy only applies to four Microsoft products:

System Center Configuration Manager (current branch)
.NET core
NET
Entity Framework core

The new policy essentially says that Microsoft will only support the current version and once they announce End of Life for a product, you have 12 months before support ends.

Given the heavy push to Microsoft’s new serving model for Windows 10 and now Server 2016, it’s a safe bet that the list of products this policy applies to will grow.

When it comes to the release of Windows Server 2016, there’s a lot to digest (known issues, PowerShell 5.0, WMF 5.1, Just Enough Administration, IIS 10).

Given the number of clients you support that may ask about upgrading older systems or virtualizing, we’re sure you’ll have plenty of opportunity to learn more… but before your clients ask, we wanted you be aware of some of the business and technical nuances.


This post was provided by one of our service providers ConnectWise.

Network Management : Is SNMP here forever?

The first SNMP release came out in 1988. 28 years later, SNMP is still around, a go to Network Management tool … Will this still be the case in 10 years from now? Difficult to say but the odds are lower these days. Why are we predicting SNMP could go away?

If you’re already savvy about SNMP, check out this blog for getting insight into current SNMP limitations and why we are making this prediction.

SNMP was designed to make it simple for the NMS to request and consume data.  But those same data models and operations make it difficult for routers to scale to the needs of today’s networks. To understand this, you first need to understand the fundamentals of SNMP.

SNMP stands for Simple Network Management Protocol. It was introduced to meet the growing need for managing IP devices in a standard way. SNMP provides its users with a “simple” set of operations that allows these devices to be managed remotely. SNMP was designed to make it simple for the NMS to request and consume data. But those same data models and operations make it difficult for routers to scale to the needs of today’s networks.  To understand this, you first need to understand the fundamentals of SNMP.

For example, you can use SNMP to shut down an interface on your router or check the speed at which your Ethernet interface is operating. SNMP can even monitor the temperature on your router and warn you when it is getting too high.

The overall architecture is rather simple – there are essentially 2 main components (see Figure 1)

  • A centralized NMS system
  • Distributed agents (little piece of software running on managed network devices)

NMS is responsible for polling and receiving traps from agents in the network:

  • Polling a network device is the act of querying an agent for some piece of information.
  • A trap is a way for the agent to alert the NMS that something wrong has happened. Traps are sent asynchronously, not in response to queries from the NMS.

How is information actually structured on network devices? A Management Information Base (MIB) is present on every network device. This can be thought as a database of objects that the agent tracks. Any piece of information that can be accessed by the NMS is defined in a MIB.

Managed objects are stored into a treelike hierarchy as described in Figure 2:

The directory branch is actually not used. The management branch (mgmt) defines a standard set of objects that every network device needs to support. The experimental branch is for research purposes only and finally the private branch is for vendors to define objects specific to their devices.

Each managed object is uniquely defined by a name, e.g. an OID (Object Identifier). An object ID consists of a series of integers based on the nodes in the tree, separated by dots (.).

Under the mgmt branch, one can find the MIB-II that is an important MIB for TCP/IP networks. It is defined in RFC 1213 and you can see an extract in Figure 3.

With that mind, the OID for accessing information related to interfaces is: 1.3.6.1.2.1.2 and for information related to system: 1.3.6.1.2.1.1

Finally, there are 2 main SNMP request types to retrieve information.

GET request – request a single value by its Object identifier (see Figure 4)

GET-NEXT request – request a single value that is next in the lexical order from the requested Object Identifier (see Figure 5)


This is a repost of a blog by one of our service partners Cisco.

The power user’s guide to PowerShell

PowerShell is a powerful tool to master. Here’s our step-by-step guide to getting familiar with Windows’ über language.

If you’ve wrestled with Windows 10, you’ve undoubtedly heard of PowerShell. If you’ve tried to do something fancy with Win7/8.1 recently, PowerShell’s probably come up, too. After years of relying on the Windows command line and tossed-together batch files, it’s time to set your sights on something more powerful, more adaptive — better.
PowerShell is an enormous addition to the Windows toolbox, and it can provoke a bit of fear given that enormity. Is it a scripting language, a command shell, a floor wax? Do you have to link a cmdlet with an instantiated .Net class to run with providers? And why do all the support docs talk about administrators — do I have to be a professional Windows admin to make use of it?

Relax. PowerShell is powerful, but it needn’t be intimidating.
The following guide is aimed at those who have run a Windows command or two or jimmied a batch file. Consider it a step-by-step transformation from PowerShell curious to PowerShell capable.

Step 1: Crank it up

The first thing you’ll need is PowerShell itself. If you’re using Windows 10, you already have PowerShell 5 — the latest version — installed. (Win10 Anniversary Update has 5.1, but you won’t know the difference with the Fall Update’s 5.0.) Windows 8 and 8.1 ship with PowerShell 4, which is good enough for getting your feet wet. Installing PowerShell on Windows 7 isn’t difficult, but it takes extra care — and you need to install .Net Framework separately. JuanPablo Jofre details how to install WMF 5.0 (Windows Management Framework), which includes PowerShell, in addition to tools you won’t likely use when starting out, on MSDN.

PowerShell offers two interfaces. Advanced users will go for the full-blown GUI, known as the Integrated Scripting Environment (ISE). Beginners, though, are best served by the PowerShell Console, a simple text interface reminiscent of the Windows command line, or even DOS 3.2.

To start PowerShell as an Administrator from Windows 10, click Start and scroll down the list of apps to Windows PowerShell. Click on that line, right-click Windows PowerShell, and choose Run as Administrator. In Windows 8.1, look for Windows PowerShell in the Windows System folder. In Win7, it’s in the Accessories folder. You can run PowerShell as a “normal” user by following the same sequence but with a left click.

In any version of Windows, you can use Windows search to look for PowerShell. In Windows 8.1 and Windows 10, you can put it on your Ctrl-X “Power menu” (right-click a blank spot on the taskbar and choose Properties; on the Navigation tab, check the box to Replace Command Prompt). Once you have it open, it’s a good idea to pin PowerShell to your taskbar. Yes, you’re going to like it that much.

Step 2: Type old-fashioned Windows commands

You’d be amazed how much Windows command-line syntax works as expected in PowerShell.
For example, cd changes directories (aka folders), and dir still lists all the files and folders included in the current folder.
Depending on how you start the PowerShell console, you may start at c:\Windows\system32 or at c:\Users\<username>. In the screenshot example, I use cd .. (note the space) to move up one level at a time, then run dir to list all files and subfolders in the C:\ directory.

Step 3: Install the help files

Commands like cd and dir aren’t native PowerShell commands. They’re aliases — substitutes for real PowerShell commands. Aliases can be handy for those of us with finger memory that’s hard to overcome. But they don’t even begin to touch the most important parts of PowerShell.

To start getting a feel for PowerShell itself, type help followed by a command you know. For example, in the screenshot, I type help dir.

PowerShell help tells me that dir is an alias for the PowerShell command Get-ChildItem. Sure enough, if you type get-childitem at the PS C:\> prompt, you see exactly what you saw with the dir command.

As noted at the bottom of the screenshot, help files for PowerShell aren’t installed automatically. To retrieve them (you do want to get them), log on to PowerShell in Administrator mode, then type update-help. Installing the help files will take several minutes, and you may be missing a few modules — Help for NetWNV and SecureBoot failed to install on my test machine. But when you’re done, the full help system will be at your beck and call.

From that point on, type get-help followed by the command (“cmdlet” in PowerShell speak, pronounced “command-let”) that concerns you and see all of the help for that item. For example, get-help get-childitem produces a summary of the get-childitem options. It also prompts you to type in variations on the theme. Thus, the following:

get-help get-childitem -examples

produces seven detailed examples of how to use get-childitem. The PowerShell command

get-help get-childitem -detailed

includes those seven examples, as well as a detailed explanation of every parameter available for the get-childitem cmdlet.

Step 4: Get help on the parameters

In the help dir screenshot, you might have noticed there are two listings under SYNTAX for get-childitem. The fact that there are two separate syntaxes for the cmdlet means there are two ways of running the cmdlet. How do you keep the syntaxes separate — and what do the parameters mean? The answer’s easy, if you know the trick.
To get all the details about parameters for the get-childitem cmdlet, or any other cmdlet, use the -full parameter, like this:

get-help get-childitem -full

That produces a line-by-line listing of what you can do with the cmdlet and what may (or may not!) happen. See the screenshot.

Sifting through the parameter details, it’s reasonably easy to see that get-childitem can be used to retrieve “child” items (such as the names of subfolders or filenames) in a location that you specify, with or without specific character matches. For example:

get-childItem “*.txt” -recurse

retrieves a list of all of the “*.txt” files in the current folder and all subfolders (due to the -recurse parameter). Whereas the following:

get-childitem “HKLM:\Software”

returns a list of all of the high-level registry keys in HKEY_LOCAL_MACHINE\Software.
If you’ve ever tried to get inside the registry using a Windows command line or a batch file, I’m sure you can see how powerful this kind of access must be.

Step 5: Nail down the names
There’s a reason why the cmdlets we’ve seen so far look the same: get-childitem, update-help, and get-help all follow the same verb-noun convention. Mercifully, all of PowerShell’s cmdlets use this convention, with a verb preceding a (singular) noun. Those of you who spent weeks struggling over inconsistently named VB and VBA commands can breathe a sigh of relief.
To see where we’re going, take a look at some of the most common cmdlets (thanks to Ed Wilson’s Hey, Scripting Guy! blog). Start with the cmdlets that reach into your system and pull out useful information, like the following:

set-location: Sets the current working location to a specified location
get-content: Gets the contents of a file
get-item: Gets files and folders
copy-item: Copies an item from one location to another
remove-item: Deletes files and folders
get-process: Gets the processes that are running on a local or remote computer
get-service: Gets the services running on a local or remote computer
invoke-webrequest: Gets content from a web page on the internet

To see how a particular cmdlet works, use get-help, as in
get-help copy-item -full

Based on its help description, you can readily figure out what the cmdlet wants. For example, if you want to copy all your files and folders from Documents to c:\temp, you would use:
copy-item c:\users\[username] \documents\* c:\temp

As you type in that command, you’ll see a few nice touches built into the PowerShell environment. For example, if you type copy-i and press the Tab key, PowerShell fills in Copy-Item and a space.

If you mistype a cmdlet and PowerShell can’t figure it out, you get a very thorough description of what went wrong.
Try this cmdlet. (It may try to get you to install a program to read the “about” box. If so, ignore it.)
invoke-webrequest netcal.com

You get a succinct list of the web page’s content declarations, headers, images, links, and more. See how that works? Notice in the get-help listing for invoke-webrequest that the invoke-webrequest cmdlet “returns collections of forms, links, images, and other significant HTML elements” — exactly what you should see on your screen.
Some cmdlets help you control or grok PowerShell itself:
get-command: Lists all available cmdlets (it’s a long list!)
get-verb: Lists all available verbs (the left halves of cmdlets)
clear-host: Clears the display in the host program

Various parameters (remember, get-help) let you whittle down the commands and narrow in on options that may be of use to you. For example, to see a list of all the cmdlets that work with Windows services, try this:
get-command *-service
It lists all the verbs that are available with service as the noun. Here’s the result:

Get-Service
New-Service
Restart-Service
Resume-Service
Set-Service
Start-Service
Stop-Service
Suspend-Service
You can combine these cmdlets with other cmdlets to dig down into almost any part of PowerShell. That’s where pipes come into the picture.

Step 6: Bring in the pipes

If you’ve ever used the Windows command line or slogged through a batch file, you know about redirection and pipes. In simple terms, both redirection (the > character) and pipes (the | character) take the output from an action and stick it someplace else. You can, for example, redirect the output of a dir command to a text file, or “pipe” the result of a ping command into a find, to filter out interesting results, like so:

dir > temp.txt
ping askwoody.com | find “packets” > temp2.txt

In the second command above, the find command looks for the string packets in the piped output of an askwoody.com ping and sticks all the lines that match in a file called temp2.txt.
Perhaps surprisingly, the first of those commands works fine in PowerShell. To run the second command, you want something like this:

ping askwoody.com | select-string packets | out-file temp2.txt

Using redirection and pipes greatly expands the Windows command line’s capabilities: Instead of scrolling endlessly down a screen looking for a text string, for example, you can put together a piped Windows command that does the vetting for you.

PowerShell has a piping capability, but it isn’t restricted to text. Instead, PowerShell lets you pass an entire object from one cmdlet to the next, where an “object” is a combination of data (called properties) and the actions (methods) that can be used on the data.

The hard part, however, lies in aligning the objects. The kind of object delivered by one cmdlet has to match up with the kinds of objects accepted by the receiving cmdlet. Text is a very simple kind of object, so if you’re working with text, lining up items is easy. Other objects aren’t so rudimentary.

How to figure it out? Welcome to the get-member cmdlet. If you want to know what type of object a cmdlet produces, pipe it through get-member. For example, if you’re trying to figure out the processes running on your computer, and you’ve narrowed down the options to the get-process cmdlet, here’s how you find out what the get-process cmdlet produces:
get-process | get-member

Running that command produces a long list of properties and methods for get-process, but at the very beginning of the list you can see the type of object that get-process creates:

TypeName: System.Diagnostics.Process

The below screenshot also tells you that get-process has properties called Handles, Name, NPM, PM, SI, VM, and WS.
If you want to manipulate the output of get-process so that you can work with it (as opposed to having it display a long list of active processes on the monitor), you need to find another cmdlet that will work with System.Diagnostics.Process as input. To find a willing cmdlet, you simply use … wait for it … PowerShell:
get-command -Parametertype System.Diagnostics.Process

That produces a list of all of the cmdlets that can handle System.Diagnostics.Process.
Some cmdlets are notorious for taking nearly any kind of input. Chief among them: where-object. Perhaps confusingly, where-object loops through each item sent down the pipeline, one by one, and applies whatever selection criteria you request. There’s a special marker called $_. that lets you step through each item in the pipe, one at a time.
Say you wanted to come up with a list of all of the processes running on your machine that are called “svchost” — in PowerShell speak, you want to match on a Name property of svchost. Try this PowerShell command:

get-process | where-object {$_.Name -eq “svchost”}

The where-object cmdlet looks at each System.Diagnostics.Process item, compares the .Name of that item to “svchost”; if the item matches, it gets spit out the end of the pipe and typed on your monitor.

 

Windows Server 2016

The next version of windows server is here and its packed with a lineup of great new features. From software-defined storage, network improvements and Docker-driven containers.

True to type with the new version of Windows Server 2016, we are presented with a multitude of new features. Added networking and storage capabilities build on the software defined infrastructure which began its initiation in Windows Server 2012. Microsoft’s focus on the cloud is apparent with capabilities such as containers and Nano Server. Security is still priority with the shielded VMs features.

 Docker- Driven Containers

 Microsoft has worked together with Docker to bring full support for the Docker ecosystem to Windows Server 2016. Docker containers wrap a piece of software in a complete filesystem that contains everything needed to run: code, runtime, system tools, system libraries – anything that can be installed on a server. This guarantees that the software will always run the same, regardless of its environment. Containers represent a huge step for Microsoft as it embraces the open source world. You install support for Containers using the standard method to enable Windows features through Control Panel or via the PowerShell command:

Install-WindowsFeature containers

You must also download and install the Docker engine to get all of the Docker utilities. This line of PowerShell will download a Zip file with everything you need to install Docker on Windows Server 2016:

Invoke-WebRequest “https://get.docker.com/builds/Windows/x86_64/docker-1.12.1.zip” -OutFile “$env:TEMP\docker-1.12.1.zip” -UseBasicParsing

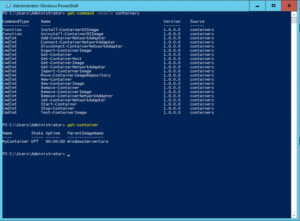
Full documentation for getting started with containers can be found on the Microsoft MSDN website. New PowerShell cmdlets provide an alternative to Docker commands to manage your containers (see Figure 1).

pwrshell

Figure 1: You can manage both Windows Server Containers and Hyper-V Containers through native Docker commands or through PowerShell (shown).

It’s important to note that Microsoft supports two different container models: Windows Server Containers and Hyper-V Containers. Windows Server Containers are based on the typical Docker concepts, running each container as an application on top of the host OS. On an opposite note, Hyper-V Containers are completely isolated virtual machines, incorporating their own copy of the Windows kernel, but more lightweight than traditional VMs.

Windows containers are built against a specific operating system and are crosscomplied with Linux to provide the same experience and common Docker engine. For you, this means that Windows containers supports the Docker experience including the Docker command structure, Docker repositories, Docker datacenter and Orchestration. In addition, Windows containers extends the Docker Community to provide Windows innovations such as PowerShell to manage Windows or Linux containers.

Nano Server

Nano Server is another key component of Microsoft’s strategy to be highly competitive in the private cloud market. Nano Server is stripped-down version of Windows Server 2016. It’s so stripped down, in fact, that it doesn’t have any direct user interface besides the new Emergency Management console. You will manage your Nano instances remotely using either Windows PowerShell or the new Remote Server Administration Tools. The first benefit is Infrastructure host, that can runs Hyper-V, File Server, Failover Clustering and it will be a great container host as well.

Figure 2: Nano Server not only boots faster, it consumes less memory and less disk than any other version of Windows Server.

Figure 2: Nano Server not only boots faster, it consumes less memory and less disk than any other version of Windows Server.


Storage Qos Updates


Storage QoS enables administrators to provide virtual machines, and their applications by extension, predictable performance to an organization’s networked storage resources. Storage QoS helps level the playing field while virtual machines jockey for storage resources. According to a related Microsoft support document, the feature helps reduce “noisy neighbor” issues caused by resource-intensive virtual machines. “By default, Storage QoS ensures that a single virtual machine cannot consume all storage resources and starve other virtual machines of storage bandwidth,” stated the company.

It also offers administrators the confidence to load up on virtual machines by providing better visibility into their virtual machine storage setups. “Storage QoS policies define performance minimums and maximums for virtual machines and ensures that they are met. This provides consistent performance to virtual machines, even in dense and overprovisioned environments,” Microsoft wrote.

Windows Server 2016 allows you to centrally manage Storage QoS policies for groups of virtual machines and enforce those policies at the cluster level. This could come into play in the case where multiple VMs make up a service and should be managed together. PowerShell cmdlets have been added in support of these new features, including Get-StorageQosFlow, which provides a number of options to monitor the performance related to Storage QoS; Get-StorageQosPolicy, which will retrieve the current policy settings; and New-StorageQosPolicy, which creates a new policy.


Shielded VMs

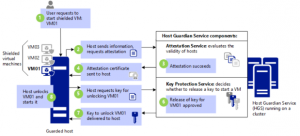
 Shielded VMs, or Shielded Virtual Machines, are a security feature introduced in Windows Server 2016 for protecting Hyper-V Generation 2 virtual machines (VMs) from unauthorized access or manipulating. Shielded VMs use a centralized certificate store and VHD encryption to authorize the activation of a VM when it matches an entry on a list of permitted and verified images. VMs use a virtual TPM to enable the use of disk encryption with BitLocker. Live migrations and VM-state are also encrypted to prevent man-in-the-middle attacks.

The HGS – Host Guardian Service (HGS) (typically, a cluster of 3 nodes) supports two different attestation modes for a guarded fabric:

TPM-trusted attestation (Hardware based)

Admin-trusted attestation (AD based)

TPM-trusted attestation is recommended because it offers stronger assurances, as explained in the following table, but it requires that your Hyper-V hosts have TPM 2.0. If you currently do not have TPM 2.0, you can use Admin-trusted attestation. If you decide to move to TPM-trusted attestation when you acquire new hardware, you can switch the attestation mode on the Host Guardian Service with little or no interruption to your fabric.

Figure 3: Shielded VMs are encrypted at rest using BitLocker. They can be run by an authorized administrator only on known, secure, and healthy hosts.

Figure 3: Shielded VMs are encrypted at rest using BitLocker. They can be run by an authorized administrator only on known, secure, and healthy hosts.

Fast Hyper-V Storage with ReFS

The Resilient File System (ReFS) is another feature introduced with Windows Server 2012. ReFS has huge performance implications for Hyper-V. New virtual machines with a fixed-size VHDX are created instantly. The same advantages apply to creating checkpoint files and to merging VHDX files created when you make a backup. These capabilities resemble what Offload Data Transfers (ODX) can do on larger storage appliances.

RemoteFX

Microsoft also did some improvements on Windows Server 2016 RemoteFX which now includes support for OpenGL 4.4 and OpenCL 1.1 API. It also allows you to use larger dedicated VRAM and VRAM in now finally configurable.

Hyper-V rolling upgrades

Windows Server 2016 enables you to upgrade to a new operating system without taking down the cluster or migrating to new hardware. In previous versions of Windows Server, it was not possible to upgrade a cluster without downtime, this caused significant issues for production systems. This new process is is similar in that individual nodes in the cluster must have all active roles moved to another node in order to upgrade the host operating system. The difference is that all members of the cluster will continue to operate at the Windows Server 2012 R2 functional level (and support migrations between old and upgraded hosts) until all hosts are running the new operating system and you explicitly upgrade the cluster functional level (by issuing a PowerShell command).

Hyper-V hot add NICs and memory

Previous versions of Hyper-V did not allow you to add a network interface or more memory to a running virtual machine. Microsoft now allows you to make some critical machine configuration changes without taking the virtual machine offline. The two most important changes involve networking and memory.

In the Windows Server 2016 version of Hyper-V Manager, you’ll find that the Network Adapter entry in the Add Hardware dialog is no longer grayed out. The benefit is that an administrator may now add network adapters and memory to VMs originally configured with fixed amounts of memory, while the VM is running.

Storage Replica

Storage Replica is a new feature that enables storage-agnostic, block-level, synchronous replication between clusters or servers for disaster preparedness and recovery, as well as stretching of a failover cluster across sites for high availability. Synchronous replication enables mi Storage Space Direct (S2D), formally known as “Shared Nothing”.WS2016 introduces the second iteration of the software-defined storage feature known as Storage Spaces to bring cloud inspired capabilities to the data center with advances in computing, networking, storage, and security. This S2D local storage architecture takes each storage node and pools it together using Storage Spaces for data protection (two- or three-way mirroring as well as parity). The local storage can be SAS or SATA (SATA SSDs provide a significant cost savings) or NVMe for increased performance.

Enabling this feature can be accomplished with a single PowerShell command:

Enable-ClusterStorageSpacesDirect

This command will initiate a process that claims all available disk space on each node in the cluster, then enables caching, tiering, resiliency, and erasure coding across columns for one shared storage pool.

storing of data in physical sites with crash-consistent volumes, ensuring zero data loss at the file system level. Asynchronous replication allows site extension beyond metropolitan ranges.


Networking enhancements

Converged Network Interface Card (NIC). The converged NIC allows you to use a single network adapter for management, Remote Direct Memory Access (RDMA)-enabled storage, and tenant traffic. This reduces the capital expenditures that are associated with each server in your datacenter, because you need fewer network adapters to manage different types of traffic per server.

Another facility is Packet Direct. Packet Direct provides a high network traffic throughput and low-latency packet processing infrastructure.

Windows Server 2016 includes a new server role called Network Controller, which provides a central point for monitoring and managing network infrastructure and services. Other enhancements supporting the software-defined network capabilities include an L4 load balancer, enhanced gateways for connecting to Azure and other remote sites, and a converged network fabric supporting both RDMA and tenant traffic.

As we move to virtualized instances in the cloud, it becomes important to reduce the footprint of each instance, to increase the security around them, and to bring more automation to the mix. In Windows Server 2016, Microsoft is pushing ahead on all of these fronts at once. Windows Server 2016 makes it easier to pick up the cloud way of functioning so you can change the way your server apps work as quickly as you want, even if you’re not using the cloud.


Windows 10 Anniversary Update

Late last month, Microsoft announced a major update to Windows 10 would be made available on August 9th.

In a post on the Windows Experience Blog, Microsoft revealed a list of new features and security upgrades, improvements to Cortana and a set of features aimed at making the Windows 10 experience better on smartphones and tablets.

This news arrives almost exactly a yeat to the day of the consumer launch of Windows 10. The new operating system has seen massive adoption by both business and consumers users in the past year, and Microsoft hope these upgrades spur further adoption by any stragglers.

Security

  • Windows Hello will now have integration with biometrics.  This will allow users to embrace security without compromising convenience.
  • Improvements to Windows Defender (MS Antimalware software)
    • Windows Defender Advanced Threat Protection — cloud based antimalware software for enterprise
  • Windows Information Protection (more information here)

Cortana

This update will include updates to Cortana, the Microsoft virtual assistant, to hopefully make her more useful. The assistant is now available to take commands on users’ lock screens, so they can do things like ask questions and play music without having to unlock their devices.  Cortana can also remember things for users, such as their shopping lists or important to do item so that people do not have to refer to other platforms to retrieve them.

Windows Ink

Microsoft is also introducing new tools that make it easier to jot down notes using a touchscreen-enabled tablet or laptop. The Windows Ink features give users a virtual notepad to doodle, sketch or scribble down notes without having to wait for an app to launch.  Furthermore, key apps have new ink-specific features, like using handwriting in Office, ink annotations in Microsoft Edge or drawing custom routes in Maps.

Thats only to touch on a few of the key items in the update, there will be further secuirty enhancements and improved xbox integration. Microsoft Edge also received a handful of updates, including support for browser extensions which should make it more of a credible alternative to Chrome or Firefox.

Edge Browser

  • Battery usage efficiency gains — up to 3 hours compared to Google Chrome
  • Extensions available
  • Accessibility with HTML5, CSS3, Aria

Application Whitelisting Using Software Restriction Policies

Software Restriction Policies (SRP) allows administrators to manage what applications are permitted to run on Microsoft Windows. SRP is a Windows feature that can be configured as a local computer policy or as a domain policy through Group Policy with Windows Server 2003 domains and above. The use of SRP as a white-listing technique will increase the security feature of the domain by preventing malicious programs from running since the administrators can manage which software or applications are allowed to run on client PCs.

Blacklisting is a reactive technique that does not extend well to the increasing number and variety of malware. There have been many attacks that cannot be blocked by the blacklisting techniques since it uses undiscovered vulnerabilities known as zero-day vulnerabilities.

On the other hand, Application white-listing is a practical technique where only a limited number of programs are allowed to run and the rest of the programs are blocked by default. It makes it hard for attackers to get in to the network since it needs to exploit one of the allowed programs on the user’s computer or get around the white-listing mechanism to make a successful attack. This approach should not be seen as replacement standard security software such as anti virus or firewalls – it is best used in conjunction with these.

Since Microsoft Windows operating systems have SRP functionality built in, administrators can readily configure an application white-listing solution that only allows specific executable files to be run. Service Restriction Policies can also restrict which application libraries are permitted to be used by executable’s.

There are certain recommended SRP settings by NSA Information Assurance Directorate’s (IAD) Systems and Network Analysis Center (SNAC). It is advised to test any configuration changes on a test network or on a small set of test computers to make sure that the settings are correct before implementing the change on the whole domain.

There is known issues on certain Windows versions to consider: for example minor usability issue such as when double-clicking a document, it may not open the associated document viewer application, another is the software update method that allows users to manually apply patches may not function well once SRP is enforced. We may see these issues addressed with a hotfix provided by Microsoft. Automatic updates are not affected by SRP white-listing and will still function correctly. SRP settings should be tested thoroughly due to issues like this to prevent causing a widespread problem in your production environment.

The use of path-based SRP rules are recommended since it has shown unnoticeable performance impact on host after a good deal of testing. Other rules may provide greater security benefits than path-based rules but it has an increased impact on host performance. Other rules like file hash rules are more difficult to manage and needs constant updates each time any files are installed or updated, another is the certificate rules which is somehow limited since not all the applications’ files are digitally signed by their software publishers.

There are certain steps to follow in implementing SRP in Active Directory domain which can be done through the steps below:

1. Review the domain to find out which applications are operating on domain computers.

2. Configure SRP to work in white-listing approach.

3. Choose which applications must be permitted to run and make extra SRP rules as required.

4. Test the SRP rules and form additional rules as needed.

5. Install SRP to sequentially larger Organizational Units until SRP is functional to the entire network.

6. Observe SRP continuously and adjust the rules when needed.

SRP configuration as described above can drastically increase security stance of a domain while continuously letting users to run the applications they need to remain productive for their work.

Security Awareness: A Tale of Two Challenges

SANS Institute has recently releases their findings from a survey ‘Securing The Human 2016’ about Security Awareness that led them to uncover two key findings: First, the security awareness team are not getting enough support they need and second, the experts in the field of security awareness lack soft skills to get the knowledge they have distributed properly.

This is the second annual security awareness report released and its main goal is to allow security awareness officers to make knowledgeable decisions on how to make their security programs better and to let them compare their organizations program to other programs in their industry.

SANS Institute provides information security training all over the world. For over 25 years of experience they are considered as the most trusted and the principal source of information security training. SANS : Securing The Human is an institute division that gives complete and comprehensive security awareness solution to organizations which can help them to effectively manage their human cyber security risk.

Report Summary

This years’ approach tells a story through data, compared to last year where the data and results were presented in the order the survey was taken. The data tells a story about the tale of two challenges which they began to see as they worked through the data.

They conducted a survey on what are the biggest challenges that security officers encountered and the results were tremendous giving them over a 100 different topics. The responses were categorized into 12 categories by Ingolf Becker, from University College of London. The seven problem categories include: resources, adoption, support from management, end user support, finding time to take part, content and not enough staff awareness. They have focused on the first seven on the list which fell into two general groups: lack of resources, time, support and/or not having an impact. The people are either limited on their ability to execute (46%) and/or fails to deliver the needed impact (47%). This starts the tale of two challenges and this report is focused on understanding these challenges and identifying possible solutions.

e Programs Awareness Challenge Biggest o

Categorization of Biggest Challenge Awareness Programs Face


Similar to last year’s report, the data showed that a lot of awareness staff has insufficient resources, time and support to get the work completed.

Resources, as defined by Ingolf, are about the shortage of money or technical resources. Budget wise more than 50% of respondents stated that they either have a budget of $5,000 or less or they are not aware if they do have a budget and only 25% reported a budget of $25,000 or more.

Estimated Budget for 2016

Less than 15% of the respondents work full-time in awareness which is an improvement from last year’s 10% it is still considerably low. While there is an improvement only 65% says that they only spend 25% or less of their time on awareness.

Even if the people are getting support for security awareness they do not have or there is only a few metrics considered that demonstrates the human problem, impact or awareness. Most are focused on phishing which is a common top human risk, which is good but this is only one of the many organizational human risk to deal with.

Communication was identified to be the number one blocker in the program. This is more evident in larger organizations where they have 1,000 employees or more. Highly technical people reports to the highly technical department have communications as their biggest blocker even if their main job is to communicate to the organization.

Recommendations

As a recommendation they proposed that communications as one of the most critical soft skills needs to be addressed by training; place someone from the communications department into the awareness team or hire someone with the soft skills they need. As for the engagement, people needs to know why they should care about security awareness and target them at an emotional level rather than giving them statistics and numbers.

Patch Management

Patch Management – Best Practices

Why Does Patch Management Matter?

Simply put, patching is important because of IT governance. As a corporate IT department, you’re held responsible when viruses affect users or applications stop working. It becomes your problem to solve. Securing your organization’s end points against intrusion is your first line of defense. With an increasing number of users working while mobile, simply securing your network through firewalls doesn’t account for company data that’s been taken outside your network perimeter. Proper patching is the best start to securing those devices. Most IT professionals pay attention to security and patching their users’ systems, but how many have a well-honed patch management policy? Patch management is often seen as a trivial task by end users—simply click ‘update’. For administrators, there’s a lot more to it, and a proper policy is certainly not overkill. But what should a patch management policy include apart from deploying patches? Read on to learn how to implement patch management policies, processes and persistence.

1 – Policy

The first step in developing a patch management strategy is to develop a policy that outlines the who, what, how and when of patching your systems. This up-front planning enables you to be proactive instead of reactive. Proactive management anticipates problems in advance and develops policies to deal with them; reactive management adds layer upon layer of hastily thought-up solutions that get cobbled together using bits of string and glue. It’s easy to see which approach will unravel in the event of a crisis. The goal of patch management policy is to effectively identify and fix vulnerabilities. Once you’re notified of a critical weakness, you should immediately know who will deal with it, how it will deployed and how quickly it will be fixed. For example, a simple element of a patch management policy might be that critical or important patches should be applied first.

2 – Discovery

Information comes to you about a newly released patch meant to address a product defect or vulnerability. These notifications can originate from a number of places—LabTech, Automatic Updates, Microsoft’s Security Notification Service. It all depends on which tools you use to monitor and keep your systems up-to-date. In this chapter, we’ll talk about a number of 2 proven tools you can use to manage patching notifications.

3 – Persistence

Policies are useless and processes are futile unless you persist in applying them consistently. Network security requires constant vigilance, not only because new vulnerabilities and patches appear almost daily, but because new processes and tools are constantly being developed to handle the growing problem of keeping systems patched. Effective patch management has become a necessity in today’s information technology environments.

Reasons for this necessity are:

• The ongoing discovery of vulnerabilities in existing operating systems and applications

• The continuing threat of hackers developing applications that exploit those vulnerabilities

• Vendor requirements to patch vulnerabilities via the release of patches.

These points illustrate the need to constantly apply patches to your IT environments. Such a large task is best accomplished following a series of repeatable, automated best practices. Therefore, it’s important to look at patch management as a closed-loop process. It is a series of best practices that have to be repeated regularly on your networks to ensure protection from exposed vulnerabilities.

Patch Management requires:

– Regular rediscovery of systems that may potentially be affected

– Scanning those systems for vulnerabilities

– Downloading patches and patch definition databases

– Deploying patches to systems that need them

4 – Patching Resources

Microsoft updates arrive predictably on Patch Tuesday (the second Tuesday of every month), which means you can plan ahead for testing and deployment. You can get advance notice by subscribing to the security bulletin, which comes out three business days before the release and includes details of the updates. The following is a list of currently available resources you can use when augmenting your patch process, as well as some that can keep you informed of patch-related updates that fall outside the scope of Microsoft updates.

Microsoft Security TechCenter – http://technet.microsoft.com/en-us/security/bb291012.aspx

SearchSecurity Patch News http://searchsecurity.techtarget.com/resources/Security-Patch-Management

Oracle Critical Patch Updates and Security Alerts http://www.oracle.com/technetwork/topics/security/alerts-086861.html

PatchManagement.org (Patch Mailing List) http://www.patchmanagement.org/

Patch My PC (third-party, free patching) http://www.patchmypc.net/

5 – Patching Tools

Client Management Platform Approving and deploying patches on individual machines is simply not scalable. As your organization grows, it is important to utilize a tool that can automate your patch management process, so your technicians aren’t bogged down with the mundane task of individually patching each machine. A client management platform with built-in patch management capabilities can help. When searching for the right tool, remember to look for one that enables you to:

-Identify, approve, update or ignore patches and hotfixes for one or multiple devices at a group level

-Define patch install windows for an individual device or a group of devices

-Schedule patch installation times and patch reboot times

-Create tickets for all successful patch install jobs

-Provide detailed reports of patch install jobs to your management team


Third-Party Patching Tools

It is important to ensure timely installation of patches, so security holes remain closed not only in the Windows operating system, but also in software products that are used on desktops and servers. A third-party patching tool such as App-Care or Ninite can be used for obtaining, testing and deploying updates to third-party applications. Be sure to look for a third-party patching tool that integrates seamlessly with your client management platform for increased automation and efficiency.


Summary

Patch management is a critical process in protecting your systems from known vulnerabilities and exploits that could result in your organization’s systems being compromised. Viruses and malware are just two examples of aggressors that take advantage of these weaknesses and can be especially destructive and difficult to correct. Patches correct bugs, flaws and provide enhancements, which can prevent potential user impact, improve user experience and save your technicians time researching and repairing issues that could have already been resolved or prevented with an existing update. Users generally understand that their systems need to be patched, but they often do not have the expertise to comfortably approve and install patches without help. Developing best practices to manage the risks associated with the approval and deployment of patches is critical to your IT department’s service offering.


This article was provided by our partner Labtech


A note on Group Policy and gpudate

When I first started learning about Active Directory, Group Policy always seemed very fickle. Sometimes I could run GPUpdate, other times I had to append the /force option.

Capture2

As it turned out, Group Policy was always working –  I just didn’t understand it. So what’s the difference between GPUpdate and GPUpdate /force? Well –

GPUpdate: Applies any policies that is new or modified

GPUpdate /force: Reapplies every policy, new and old.

So which one should I use? 99% of the time, you should only run gpupdate. If you just edited a GPO and want to see results immediately, running gpupdate will do the trick. In fact, running GPUpdate /force on a large number of computers could adversely affect network resources. This is because these machines will hit a domain controller and reevaluate every GPO applicable to them.

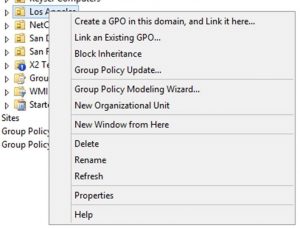
Notice the Group Policy Update option for OUs:

ou-pol


How Attackers Use a Flash Exploit to Distribute Malware

Adobe Flash is multimedia software that runs on more than 1 billion systems worldwide. Its long list of security vulnerabilities and huge market presence make it a ‘target-rich environment’ for attackers to exploit. According to Recorded Future, from January 1, 2015 to September 30, 2015, Adobe Flash Player comprised eight of the top 10 vulnerabilities leveraged by exploit kits.

Here is an illustration of just how quickly bad actors can deploy an exploit:

  • May 8 2016: FireEye discovers a new exploit targeting an unknown vulnerability in Flash and reports it to Adobe.
  • May 10 , 2016: Adobe announces a new critical vulnerability (CVE-2016-4117) that affect Windows, Macintosh, Linux, and Chrome OS
  • May 12, 2016: Adobe issues a patch for the new vulnerability (APSB16-15)
  • May 25, 2016: Malwarebytes Labs documents a ‘malvertising’ gang using this exploit to compromise your system via distribution of malware well-known websites and avoid detection

The Malwarebytes blog is a good read, as it provides several examples of how sophisticated malware distribution schemes have become. For example, it breaks down the malicious elements of a rogue advertising banner that the Flash exploit allows attackers to use to push out malware. Among other things, it runs a series of checks to see if the targeted system is running packet analyzers and security technology, to ensure that it only directs legitimate vulnerable systems to the Angler Exploit Kit.

Impact on you

With over 1 billion systems running Adobe Flash, it is likely that one or more systems under your control are vulnerable to this exploit. Fortunately, there is a fix to patch the vulnerability. Unfortunately, according to Adobe, it takes 6 weeks for more than 400 million systems to update to a new version of Flash Player. Six weeks (or however long it takes you to patch Flash) is a long time to be at risk of being compromised by ransomware via the Angler EK.