Windows 10 October 2018 Update

Earlier today, Yusuf Mehdi announced the Windows 10 October 2018 Update, the newest feature update for Windows 10. I’m excited to share our October 2018 Update rollout plans, how you can get the update today, plus some new update experience enhancements.

How to get the Windows 10 October 2018 Update

As with prior Windows 10 feature rollouts, our goal is to deliver the October 2018 Update in a phased and controlled rollout to provide a great update experience for all. We are beginning the global rollout out via Windows Update in the coming weeks.  As with previous rollouts, we will use real-time feedback and telemetry to update your device when data shows your device is ready and will have a great experience. You don’t have to do anything to get the update; it will roll out automatically to you through Windows Update.

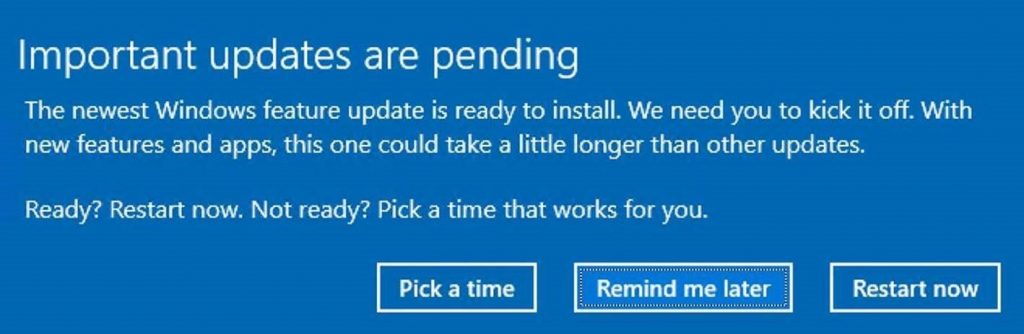
Once the update is downloaded to your device and ready to be installed we’ll notify you.  You are then able to pick a time that won’t disrupt you to finish the installation and reboot.   We are continually working to improve the update experience with each new release of Windows 10.

Windows updates

The last Windows 10 feature update rollout, the April 2018 Update, utilized machine learning (ML) to identify devices that were ready to update, incorporating key attributes like compatibility data. By leveraging machine learning we were able to safely rollout quickly, and as a result the April 2018 Update is now the most widely used version of Windows 10.  Further, our artificial intelligence/ML targeted rollout approach led to the lowest call and online support requests for any release of Windows 10.

With the October 2018 Update, we are expanding our use of machine learning and intelligently selecting devices that our data and feedback predict will have a smooth update experience. We will be further enhancing the performance of our machine learning model by incorporating more device signals such as improved driver telemetry and weighting of key features such as anti-malware software as we broaden the phased rollout. As we did with the April 2018 Update, we will be proactively monitoring all available feedback and update experience data, making the appropriate product updates when we detect issues, and adjusting the rate of rollout as needed to assure all devices have the best possible update experience.

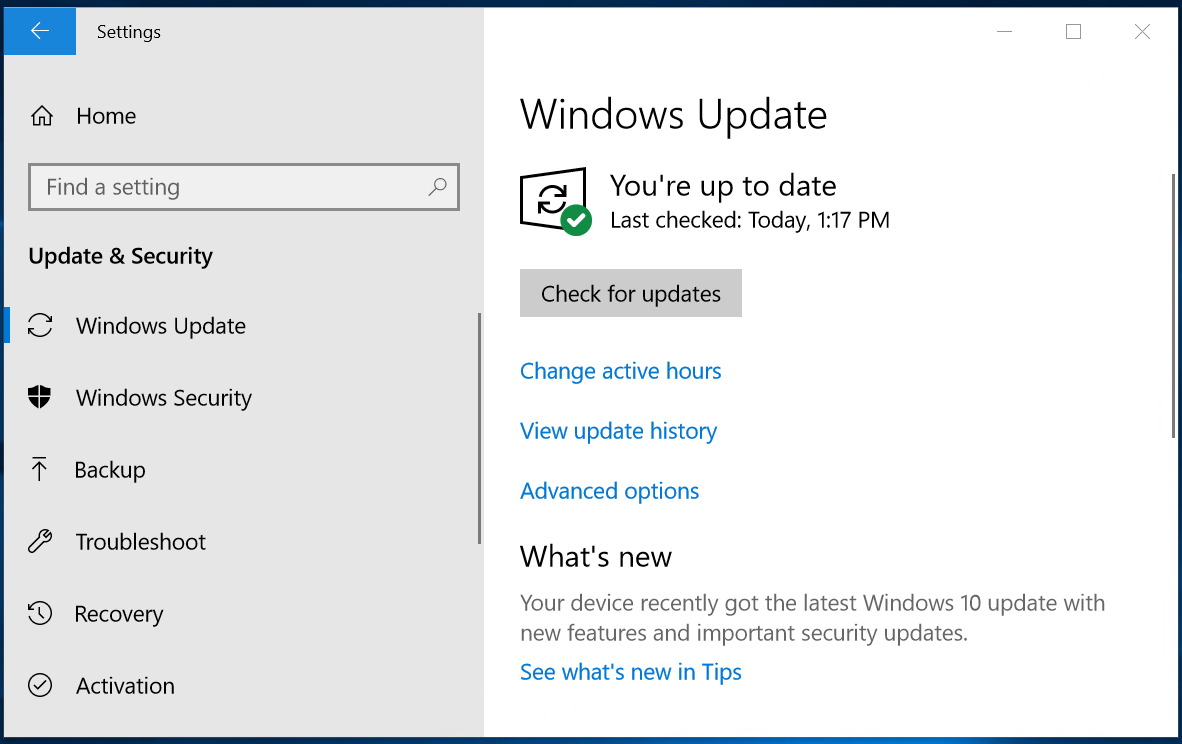
Want the Windows 10 October 2018 Update today? Start by manually checking for updates

While we encourage you to wait until the update is offered to your device, if you’re an advanced user on an actively serviced version of Windows 10 and would like to install the Windows 10 October 2018 Update now, you can do so by manually checking for updates. In the Search box in the taskbar, type “Check for updates.” Once there, simply click “Check for updates” to begin the download and installation process. We are also streamlining the ability for users who seek to manually check for updates by limiting this to devices with no known key blocking issues, based on our ML model.  If we detect that your device has a compatibility issue, we will not install the update until that issue is resolved, even if you “Check for updates.”  You can also watch this video that outlines how to get the October 2018 Update.

windows 10 update settingswindows 10 update settings 2

If you’re using a Windows 10 PC at work, you will need to check with your IT administrator for details on your organization’s specific plans to update.

Improving the update experience

We have heard clear feedback that while our users appreciate that updates keep their devices secure, they find the update experience can sometimes be disruptive.  The October Update includes several improvements to the update experience to offer more control and further reduce disruptions.

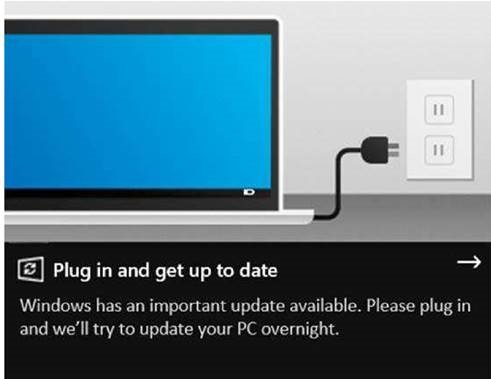
Intelligent scheduling of update activity: For our many mobile users on laptops and 2-in-1 devices, we have improved Window’s ability to know when a device will not be in use and perform certain update activities then, so as not to disrupt the user. This ability to update at night when plugged in and not on battery power will help hide update activity and minimize user disruption from updates. To further minimize disruption (in case your system is updating overnight), Windows also silences audio when it wakes for Windows Updates.   If your device hasn’t updated for several nights, we will then suggest you plug in your device so that we can update at night.

windows 10 update nightime

Intelligent reboot scheduling:  Windows Update will now automatically determine the least disruptive opportunity, outside of Active Hours, and will use an enhanced machine-learning-powered activity check that can determine if a user is going to be away for a while or is only stepping away temporarily.

Faster updates, less down time:  We’ve also made further improvements to the feature update installation process and are targeting to further shorten the amount of time your device is offline during updates by up to 31% compared to the Windows 10 April 2018 Update (based on results from the Windows Insider Program) during the rollout of the October Update.

Smaller downloads:  In the October Update we are introducing a new update package delivery design for monthly quality updates that creates a compact update package for easier and faster deployment.  Users will benefit from the new small update size when installing applicable quality updates as they are 40% more efficient.

Enhanced privacy controls

We continue to focus on putting our customers in control so in the October Update we are enhancing the privacy choice and controls available to users to manage their privacy.  We are now enabling each new account on a device to personally tailor the main privacy settings, instead of only the initial user who sets up the device.   Furthermore, during new device setup, we now offer an activity history page that allows users the opportunity to opt in to sending activity history to Microsoft, to help improve cross device experiences.  This allows users to pick up where they left off in various activities (such as a working on a Word document) on their other devices (Learn more about activity history).

Additionally, we are splitting Inking & typing personalization out from the Speech privacy page.  This enables more granular control of your inking and typing personalization data by managing it separately from your online speech recognition data. Learn more about online speech recognition and inking & typing personalization.

nking typing personalization.

Semi-Annual Channel (Targeted) released

For our commercial customers, the release of the Windows 10, version 1809 on October 2, 2018 marks the start of the servicing timeline for the Semi-Annual Channel (“Targeted”) release; and beginning with this release, all future feature updates of Windows 10 Enterprise and Education editions that release around September will have a 30 month servicing timeline.  Just as we’re immediately beginning rolling out the October Update in phases to consumers, we recommend IT administrators do the same within their organizations to validate that apps, devices, and infrastructure used by their organization work well with the new release before broadly deploying. We use data to guide our phased consumer rollout and encourage commercial customers to do the same through Windows AnalyticsThe update is now available through Windows Server Update Services (WSUS)Windows Update for Business (WUfB) and System Center Configuration Manager’s (SCCM) phased deployment.  For an overview of what’s new and what’s changed, please see What’s new for IT pros in Windows 10, version 1809.

Continuously evolving Windows 10 and the update experience

We’re excited to bring you the latest Windows 10 Features and improvements and hope that you enjoy the improved update experience.    Please provide us feedback as we continue our journey to evolve the update experience, so that our great new product and security features and other enhancements arrive without disruption.


This article was provided by our service partner : Microsoft.com


How to properly load balance your backup infrastructure

Veeam Backup & Replication is known for ease of installation and a moderate learning curve. It is something that we take as a great achievement, but as we see in our support practice, it can sometimes lead to a “deploy and forget” approach, without fine-tuning the software or learning the nuances of its work. In our previous blog posts, we examined tape configuration considerations and some common misconfigurations. This time, the blog post is aimed at giving the reader some insight on a Veeam Backup & Replication infrastructure, how data flows between the components, and most importantly, how to properly load balance backup components so that the system can work stably and efficiently.

Overview of a Veeam Backup & Replication infrastructure

Veeam Backup & Replication is a modular system. This means that Veeam as a backup solution consists of a number of components, each with a specific function. Examples of such components are the Veeam server itself (as the management component), proxy, repository, WAN accelerator and others. Of course, several components can be installed on a single server (provided that it has sufficient resources) and many customers opt for all-in-one installations. However, distributing components can give several benefits:

  • For customers with branch offices, it is possible to localize the majority of backup traffic by deploying components locally.
  • It allows to scale out easily. If your backup window increases, you can deploy an additional proxy. If you need to expand your backup repository, you can switch to scale-out backup repository and add new extents as needed.
  • You can achieve a High Availability for some of the components. For example, if you have multiple proxies and one goes offline, the backups will still be created.

Such system can only work efficiently if everything is balanced. An unbalanced backup infrastructure can slow down due to unexpected bottlenecks or even cause backup failures because of overloaded components.

Let’s review how data flows in a Veeam infrastructure during a backup (we’re using a vSphere environment in this example):

veeam 1

All data in Veeam Backup & Replication flows between source and target transport agents. Let’s take a backup job as an example: a source agent is running on a backup proxy and its job is to read the data from a datastore, apply compression and source-side deduplication and send it over to a target agent. The target agent is running directly on a Windows/Linux repository or a gateway if a CIFS share is used. Its job is to apply a target-side deduplication and save the data in a backup file (.VKB, .VIB etc).

That means there are always two components involved, even if they are essentially on the same server and both must be taken into account when planning the resources.

Tasks balancing between proxy and repository

To start, we must examine the notion of a “task.” In Veeam Backup & Replication, a task is equal to a VM disk transfer. So, if you have a job with 5 VMs and each has 2 virtual disks, there is a total of 10 tasks to process. Veeam Backup & Replication is able to process multiple tasks in parallel, but the number is still limited.

If you go to the proxy properties, on the first step you can configure the maximum concurrent tasks this proxy can process in parallel:

veeam 2

For normal backup operations, a task on the repository side also means one virtual disk transfer.

On the repository side, you can find a very similar setting:

veeam 3

For normal backup operations, a task on the repository side also means one virtual disk transfer.

This brings us to our first important point: it is crucial to keep the resources and number of tasks in balance between proxy and repository.  Suppose you have 3 proxies set to 4 tasks each (that means that on the source side, 12 virtual disks can be processed in parallel), but the repository is set to 4 tasks only (that is the default setting). That means that only 4 tasks will be processed, leaving idle resources.

The meaning of a task on a repository is different when it comes to synthetic operations (like creating synthetic full). Recall that synthetic operations do not use proxies and happen locally on a Windows/Linux repository or between a gateway and a CIFS share. In this case for normal backup chains, a task is a backup job (so 4 tasks mean that 4 jobs will be able to generate synthetic full in parallel), while for per-VM backup chains, a task is still a VM (so 4 tasks mean that repo can generate 4 separate VBKs for 4 VMs in parallel). Depending on the setup, the same number of tasks can create a very different load on a repository! Be sure to analyze your setup (the backup job mode, the job scheduling, the per-VM option) and plan resources accordingly.

Note that, unlike for a proxy, you can disable the limit for number of parallel tasks for a repository. In this case, the repository will accept all incoming data flows from proxies. This might seem convenient at first, but we highly discourage from disabling this limitation, as it may lead to overload and even job failures. Consider this scenario: a job has many VMs with a total of 100 virtual disks to process and the repository uses the per-VM option. The proxies can process 10 disks in parallel and the repository is set to the unlimited number of tasks. During an incremental backup, the load on the repository will be naturally limited by proxies, so the system will be in balance. However, then a synthetic full starts. Synthetic full does not use proxies and all operations happen solely on the repository. Since the number of tasks is not limited, the repository will try to process all 100 tasks in parallel! This will require immense resources from the repository hardware and will likely cause an overload.

Considerations when using CIFS share

If you are using a Windows or Linux repository, the target agent will start directly on the server.  When using a CIFS share as a repository, the target agent starts on a special component called a “gateway,” that will receive the incoming traffic from the source agent and send the data blocks to the CIFS share. The gateway must be placed as close to the system sharing the folder over SMB as possible, especially in scenarios with a WAN connection. You should not create topologies with a proxy/gateway on one site and CIFS share on another site “in the cloud” — you will likely encounter periodic network failures.

The same load balancing considerations described previously apply to gateways as well. However, the gateway setup requires an additional attention because there are 2 options available — set the gateway explicitly or use an automatic selection mechanism:

Any Windows “managed server” can become a gateway for a CIFS share. Depending on the situation, both options can come handy. Let’s review them.

You can set the gateway explicitly. This option can simplify the resource management — there can be no surprises as to where the target agent will start. It is recommended to use this option if an access to the share is restricted to specific servers or in case of distributed environments — you don’t want your target agent to start far away from the server hosting the share!

Things become more interesting if you choose Automatic selection. If you are using several proxies, automatic selection gives ability to use more than one gateway and distribute the load. Automatic does not mean random though and there are indeed strict rules involved.

The target agent starts on the proxy that is doing the backup. In case of normal backup chains, if there are several jobs running in parallel and each is processed by its own proxy, then multiple target agents can start as well. However, within a single job, even if the VMs in the job are processed by several proxies, the target agent will start only on one proxy, the first to start processing. For per-VM backup chains, a separate target agent starts for each VM, so you can get the load distribution even within a single job.

Synthetic operations do not use proxies, so the selection mechanism is different: the target agent starts on the mount server associated with the repository (with an ability to fail over to Veeam server if the mount server in unavailable). This means that the load of synthetic operations will not be distributed across multiple servers. As mentioned above, we discourage from setting the number of tasks to unlimited — that can cause a huge load spike on the mount/Veeam server during synthetic operations.

Additional notes

Scale-out backup repositorySOBR is essentially a collection of usual repositories (called extents). You cannot point a backup job to a specific extent, only to SOBR, however extents retain some of settings, including the load control. So what was discussed about standalone repositories, pertains to SOBR extents as well. SOBR with per-VM option (enabled by default), the “Performance” placement policy and backup chains spread out across extents will be able to optimize the resource usage.

Backup copy. Instead of a proxy, source agents will start on the source repository. All considerations described above apply to source repositories as well (although in case of Backup Copy Job, synthetic operations on a source repository are logically not possible). Note that if the source repository is a CIFS share, the source agents will start on the mount server (with a failover to Veeam server).

Deduplication appliances. For DataDomain, StoreOnce (and possibly other appliances in the future) with Veeam integration enabled, the same considerations apply as for CIFS share repositories. For a StoreOnce repository with source-side deduplication (Low Bandwidth mode) the requirement to place gateway as close to the repository as possible does not apply — for example, a gateway on one site can be configured to send data to a StoreOnce appliance on another site over WAN.

Proxy affinity. A feature added in 9.5, proxy affinity creates a “priority list” of proxies that should be preferred when a certain repository is used.

If a proxy from the list is not available, a job will use any other available proxy. However, if the proxy is available, but does not have free task slots, the job will be paused waiting for free slots. Even though the proxy affinity is a very useful feature for distributed environments, it should be used with care, especially because it is very easy to set and forget about this option. Veeam Support encountered cases about “hanging” jobs which came down to the affinity setting that was enabled and forgotten about. More details on proxy affinity.

Conclusion

Whether you are setting up your backup infrastructure from scratch or have been using Veeam Backup & Replication for a long time, we encourage you to review your setup with the information from this blog post in mind. You might be able to optimize the use of resources or mitigate some pending risks!


This article was provided by our service partner veeam.com

Unsecure RDP Connections are a Widespread Security Failure

While ransomware, last year’s dominant threat, has taken a backseat to cryptomining attacks in 2018, it has by no means disappeared. Instead, ransomware has become a more targeted business model for cybercriminals, with unsecured remote desktop protocol (RDP) connections becoming the favorite port of entry for ransomware campaigns.

RDP connections first gained popularity as attack vectors back in 2016, and early success has translated into further adoption by cybercriminals. The SamSam ransomware group has made millions of dollars by exploiting the RDP attack vector, earning the group headlines when they shut down government sectors of Atlanta and Colorado, along with the medical testing giant LabCorp this year.

Think of unsecure RDP like the thermal exhaust port on the Death Star—an unfortunate security gap that can quickly lead to catastrophe if properly exploited. Organizations are inadequately setting up remote desktop solutions, leaving their environment wide open for criminals to penetrate with brute force tools. Cybercriminals can easily find and target these organizations by scanning for open RPD connections using engines like Shodan. Even lesser-skilled criminals can simply buy RDP access to already-hacked machines on the dark web.

Once a criminal has desktop access to a corporate computer or server, it’s essentially game over from a security standpoint. An attacker with access can then easily disable endpoint protection or leverage exploits to verify their malicious payloads will execute. There are a variety of payload options available to the criminal for extracting profit from the victim as well.

Common RDP-enabled threats

Ransomware is the most obvious choice, since it’s business model is proven and allows the perpetrator to “case the joint” by browsing all data on system or shared drives to determine how valuable it is and, by extension, how large of a ransom can be requested.

Cryptominers are another payload option, emerging more recently, criminals use via the RDP attack vector. When criminals breach a system, they can see all hardware installed and, if substantial CPU and GPU hardware are available, they can use it mine cryptocurrencies such as Monero on the hardware. This often leads to instant profitability that doesn’t require any payment action from the victim, and can therefore go by undetected indefinitely.

secure password

Solving the RDP Problem

The underlying problem that opens up RDP to exploitation is poor education. If more IT professionals were aware of this attack vector (and the severity of damage it could lead to), the proper precautions could be followed to secure the gap. Beyond the tips mentioned in my tweet above, one of the best solutions we recommend is simply restricting RDP to a whitelisted IP range.

However, the reality is that too many IT departments are leaving default ports open, maintaining lax password policies, or not training their employees on how to avoid phishing attacks that could compromise their system’s credentials. Security awareness education should be paramount as employees are often the weakest link, but can also be a powerful defense in preventing your organization from compromise.


This article was provided by our service partner : webroot.com

vsphere

Get your data ready for vSphere 5.5 End of Support

There have been lots of articles and walkthroughs on how to make that upgrade work for you, and how to get to a supported level of vSphere. This VMware article is very thorough walking through each step of the process.

But we wanted to touch on making sure your data is protected prior, during and after the upgrade events.

If we look at the best practice upgrade path for vSphere, we’ll see how we make sure we’re protected at each step along the way:

vSphere EOL

Upgrade Path

The first thing that needs to be considered is what path you’ll be taking to get away from the end of general support of vSphere 5.5. You have two options:

  • vSphere 6.5 which is now going to be supported till November 2021 (so another 5 years’ time)
  • vSphere 6.7 which is the latest released version from VMware.

Another consideration to make here is support for surrounding and ecosystem partners, including Veeam. Today, Veeam fully supports vSphere 6.5 and 6.7, however, vSphere 6.5 U2 is NOT officially supported with Veeam Backup & Replication Update 3a due to the vSphere API regression.

The issue is isolated to over-provisioned environments with heavily loaded hosts (so more or less individual cases).

It’s also worth noting that there is no direct upgrade path from 5.5 to 6.7. If you’re currently running vSphere 5.5, you must first upgrade to either vSphere 6.0 or vSphere 6.5 before upgrading to vSphere 6.7.

Management – VMware Virtual Center

The first step of the vSphere upgrade path after you’ve decided and found the appropriate version, is to make sure you have a backup of your vCenter server. The vSphere 5.5 virtual center could be a Windows machine or it could be using the VCSA.

Both variants can be protected with Veeam, however, the VCSA runs on a Postgres-embedded database. Be sure to take an image-level backup with Veeam and then there is a database backup option within the appliance. Details of the second step can be found in this knowledge base article.

If you’re an existing Veeam customer, you’ll already be protecting the virtual center as part of one of your existing backup jobs.

You must also enable VMware tools quiescence to create transactionally-consistent backups and replicas for VMs that do not support Microsoft VSS (for example, Linux VMs). In this case, Veeam Backup & Replication will use the VMware Tools to freeze the file system and application data on the VM before backup or replication. VMware Tools quiescence is enabled at the job level for all VMs added to the job. By default, this option is disabled.

vSphere EOL 02

You must also ensure Application-Aware Image Processing (AAIP) is either disabled or excluded for the VCSA VM.

vSphere EOL 03

Virtual Machine Workloads

If you are already a Veeam customer, then you’ll already have your backup jobs created and working with success before the upgrade process begins. However, as part of the upgrade process, you’ll want to make sure that all backup job processes that initiate through the virtual center are paused during the upgrade process.

If the upgrade path consists of new hardware but with no vMotion licensing, then the following section will help.

Quick Migration

Veeam Quick Migration enables you to promptly migrate one or more VMs between ESXi hosts and datastores. Quick Migration allows for the migration of VMs in any state with minimum disruption.

More information on Quick Migration can be found in our user guide.

During the upgrade process

As already mentioned in the virtual machine workloads section, it is recommended to stop all vCenter-based actions prior to update. This includes Veeam, but also any other application or service that communicates with your vCenter environment. It is also worth noting that whilst the vCenter is unavailable, vSphere Distributed Resource Scheduler (DRS) and vSphere HA will not work.

Veeam vSphere Web Client

If you’re moving to vSphere 6.7 and you have the Veeam vSphere Web Client installed as a vSphere plug-in, you’ll need to install the new vSphere Veeam web client plug-in from a post-upgraded Veeam Enterprise Manager.

vSphere EOL 04

More detail can be found in Anthony Spiteri’s blog post on new HTML5 plug-in functionality.

You’ll also need to ensure that any VMware-based products or other integrated products vCenter supports are the latest versions as you upgrade to a newer version of vSphere.

Final Considerations

From a Veeam Availability perspective, the above steps are the areas that we can help and make sure that you are constantly protected against failure during the process. Each environment is going to be different and other considerations will need to be made.

Another useful link that should be used as part of your planning: Update sequence for vSphere 5.5 and its compatible VMware products (2057795)

One last thing is a shout out to one of my colleagues who has done an in-depth look at the vSphere upgrade process.


This article was provided by our service partner : Veeam.com 

Vendor management

An MSP Guide to Happy Customers

Shawn Lazarus brings a fresh take to marketing strategy with his engineering background and global perspective. He currently oversees the product marketing, social media, digital marketing, and brand management for OnPage which helps an MSP server their clients better.

An MSP’s ability to do effective work depends on their technical expertise. However, their ability to ensure customer satisfaction is what really grows their business. This is because high levels of customer satisfaction retain current clients and win over future ones. Given this reality, an MSP needs to be strategic about how they approach their work as every interaction is an opportunity to improve customer satisfaction.

With a few customer service guidelines, you can ensure you’re not only impressing potential clients, but also keeping existing ones happy. Not sure where to start? The tips below will help you improve communications with your clients, as well as establish business practices that reinforce the importance of customer relationships.

Develop a Strong Onboarding Policy

The first way to establish a strong foundation for customer satisfaction is to develop a strong onboarding policy. Onboarding defines the process of how new customers get integrated into your company’s workflow. The onboarding process should include straight-forward tasks such as cataloging a customer’s infrastructure, migrating the customer to a standard set of technology offerings, refreshing old hardware, and rolling in standard MSP tool sets.

However, the most important aspect of onboarding is documentation. Document the key processes for any new client you onboard so that when their technology is not functioning properly, your engineers can come in and properly assess and diagnose the problem. This documentation includes important items such as site details, site plans, and credentials for logging in to important software.

These expectations should be articulated during customer training so that the customer is apprised of how to contact your company and what to expect when they call during business hours or after hours. After their onboarding is complete, customers should know the answer to basic service questions, such as how long they should expect to wait until someone returns their call.

Set Client Expectations with SLAs

After onboarding a new client, a good MSP will provide them with a plan that offers a clearly defined time period in which issues will be fixed. This plan will also promise the client updates on all key stages of the incident resolution process. This is the essence of the MSP’s service level agreement (SLA). A strong SLA will help ensure you’re managing expectations, communicating effectively, and executing properly.

  • Manage Expectations: Focus on setting expectations around the time it will take you to call customers back, how long it will take until a tech is on site to fix an issue, and what a typical maintenance schedule will look like. Map out the customer journey and describe what the customer can expect from your business from beginning to end.
  • Effectively Communicate: There is often a lot of stumbling with communication. For effective client communications, develop a plan that helps you articulate the big picture. The plan should explain what happens when an issue arises for the customer and how you will respond. If there is the need for disaster recovery, how will you handle the process to get them back online?
  • Execute Properly: Effective execution is about getting the project done in a timely manner. When you’re unable to effectively execute, it’s likely because you lack either the time or personnel to deliver on what you’ve promised. You can accomplish this with two essential elements: collaboration and coordination. A business management software like ConnectWise Manage® enables you to easily centralize documentation, assign action items, track progress toward due dates, and report down to individual tasks seamlessly—ensuring no late or unfinished projects. In addition, employing an Incident Management tool like OnPage allows you to effectively execute alerts that come in from ConnectWise Manage in a timely manner. MSPs can equip even the smallest of staffs with an Incident Management Platform that allows the team to work after hours in shifts and handle alerts that are deftly sent to their smartphones, so they can attend to the alerts anytime, anywhere.
Leverage Automation

How much time is your staff spending on repetitive (yet necessary) tasks? How much more time would they have during the day if some of these tasks were automated? When repetitive yet necessary tasks are performed automatically with the right tools, the work is completed quickly and with a lower risk of human error. This also enables your staff to apply their advanced knowledge and expertise to more critical projects.

Some repeatable tasks you can automate include prioritizing tickets, routine maintenance, software upgrades, disk updates, patching, or end-virus remediation. By having tools automate these processes, your staff can spend more time on projects, planning, or providing proactive service to your customers—keeping them happy.

To take full advantage of the benefits of business automation, you’ll need tools such as a remote monitoring and management system, a ticketing system, a customer relationship management system (CRM), anti-virus solution, a remote access tool, malware detection solution, a critical alerting tool, and PBX systems—depending on your business’s specific needs.

While keeping customers happy sounds like it should be straightforward, anyone who has worked as an MSP knows that customer satisfaction is the secret sauce that separates one MSP from another. Simple things like clear communications with your clients and introducing a few new tools to your tool kit can make a huge difference in how your clients see you. By setting clear expectations and freeing up your staff from manual, repeatable tasks, you can develop strong relationships with new customers and keep your existing customers happy.


This article was provided by our service partner : Connectwise

Automation

IT Automation and Why Should You Use It?

The hottest word in IT is automation. More and more companies are using automated technology to speed up repetitive tasks, improve consistency and efficiency, and free up employees’ time. But what exactly is IT automation, and is it worth making changes so you can include it in your IT department or company? By looking at all the facts, options, and benefits, you can make an informed decision and maximize the potential of IT automation for your team.

What is IT Automation?

IT automation is a set of tools and technologies that perform manual, repetitive tasks involving IT systems. In other words, it’s software that carries out information technology tasks without the need for human intervention. IT automation plays an essential role in proactive service delivery, allowing you to provide faster, more effective technology services to your clients. It can also create, implement, and operate applications that keep your business running smoothly.

Businesses today are increasingly turning to IT automation as a method that saves time and improves accuracy, among other benefits. IT automation can apply to a number of different processes, from configuration management to security and alerting. Regardless of what type of technology services you offer—whether it’s managed print services, value-added reselling, internal IT, or managed services—there’s always room for automation within your company.

What Are the Benefits of IT Automation?

Being a time-saver is where IT automation offers the most benefits. As Information Age reports, employees lose an average of 19 working days per year to repetitive tasks like data entry and processing—things that could easily be automated.

By handling redundant tasks automatically, IT automation eliminates the need for techs to spend hours creating tickets, configuring application systems, and performing other tedious functions. As a result, your team can turn their attention to higher priority tasks. And while that will probably come as a relief to your employees, that’s not where the benefits end.

Automating repetitive tasks allows your team to handle more, which enables you to bring on more clients and reduce the need to hire additional employees. In other words, IT automation means you can do more with less.

Technology professionals that use IT automation tend to see a weekly billing average in the 40- to 100-hour range, meaning the automation software performs that many hours of human labor per week. Breaking that down, it translates to the work of one to two and a half full-time employees. Unlike employees, the automation system performs at a fixed cost and never takes a holiday or sick leave. It’s always doing its job.

Of course, we’re not suggesting that IT automation should replace human employees. Rather, it helps employees perform their jobs with greater power and accuracy. It pushes the boundaries of what your team can achieve.

Another benefit of IT automation is simply your peace of mind. As an entrepreneur and/or a manager, it can be hard to hand over all your IT tasks to an employee, and trust that they’ll get the job done. You may feel the need to remind them or check in regularly to see their progress, and that in itself can take up time. With IT automation, all of that is taken care of, which means you can turn your attention to higher pursuits.

Many IT automation systems handle everything from one platform, which greatly improves organization and cross-department visibility. You’ll be able to access all the information you need quickly and seamlessly from one location. And you’ll be able to check in with other departments via a few simple clicks.

You’ve heard that consistency is key. A good IT automation strategy allows you to provide a consistent customer experience. By monitoring workflow, it also ensures that no steps are missed in the delivery process. Since everything is handled automatically, IT automation also cuts down on response times, leading to quicker customer interactions and a more efficient process from start to finish. Needless to say, consistency and a high level of accuracy really are key to satisfying customers, and an improved customer satisfaction rate means more business for your company.

What Are the Risks of Not Automating?

Even if you haven’t yet made the decision to automate, you can safely assume most of your competitors already have. Automation is quickly changing the face of the IT world. In a 2017 study by Smartsheet— which surveyed approximately 1,000 information workers—65 percent reported using automation in their daily work, while 28 percent said their company plans to start using automation in the future. Clearly, if you’re not currently using IT automation, you’re already falling behind the competition.

Companies using automation have discovered that it saves significant time—and that time translates to money. As an example, let’s look at the time an average IT department pours into reactive tickets. If we assume that a technician creates 20 tickets a day, that’s about 100 tickets per week, or 5,000 per year. If automation would allow a tech to save three minutes per ticket by saving them from manually re-entering information, and the billable rate is $125/hour, that translates to $31,250 a year in savings—per technician. Imagine the difference it could make to your bottom line if all your technicians were leveraging automation.

Which Tasks Should You Automate?

If you’re considering automating a certain task, that task should meet the following criteria: It can be resolved consistently through documented steps; and the solution can be performed without accessing the user interface. Once you’ve decided which tasks to automate, the next step is to decide which automation systems to implement.

How to Automate IT

The prevalence of automation in the IT industry today means there is a plethora of tools available to help you make the switch. Here are some of the most effective automated system solutions for IT teams.

RMM

RMM (remote monitoring and management) is a software that allows you to monitor devices, networks, and client endpoints remotely and proactively. Like most IT systems, RMM tools are basically automation engines that can reproduce processes and solve cause and effect situations.

A bonus of RMM software is that it can monitor client devices and detect issues proactively. RMM will then create a ticket for the issue, and your tech team can address it before the issue even comes to the client’s attention. RMM also allows your team to manage more endpoints, greatly increasing productivity.

PSA / Workflow Rules

A PSA (professional services automation) is a system for automating business management tasks. By establishing workflow rules, or automated, repeatable processes, you can program the software to perform certain tasks, like reminding clients of contract renewals or license expirations.

Using workflow rules can greatly simplify the process of managing tickets and service tasks. When it comes to workflow, there are three basic types to focus on for service delivery:

  • Status workflow sends a notification when a ticket status changes to a specific value.
  • Escalation workflow defines the steps to be taken based on the conditions of a ticket.
  • Auto resolution workflow keeps tickets from piling up by creating auto-closure timeframes for alerts that are informational or historical.

Many companies benefit from combining PSA and RMM solutions. For example, based on the real-time alerts you receive in your RMM software, you can automatically generate and manage service tickets in your PSA software, and thereby respond to customer needs more quickly than ever.

Whether or not you need to ticket everything that the RMM software generates is a highly debated topic, but it all comes down to the idea of information. With the right data, you can predict problems before they occur and simplify the troubleshooting process. You’ll have all the info you need about each client, and you’ll be able to see supported devices, service history, and other details. Perhaps best of all, you won’t waste time hunting around for that information. You can simply pull up the ticket and find everything you need, which translates to a faster turnaround and the ability to quickly move on to the next client.

Remote Support and Access

Remote support and access software can integrate with RMM and PSA solutions to help you rectify tech issues, track time and activity onto a ticket, and quickly find that information later while auditing. In effect, remote support and access acts as a bridge between you, your end users, and their devices. Provided the endpoint is online, this software allows you to deliver fast and secure reactive services. Remote support and access can help you both work directly with a customer and remotely access unattended devices. It’s a way to solve issues more quickly from a remote location.

Marketing Automation / CRM Capabilities

The average marketer spends nearly one-third of the work week completing repetitive tasks, according to a study conducted by HubSpot. Those tasks include gathering and organizing data, emailing clients, building landing pages, and managing lists. With a marketing automation tool, you can greatly reduce that number and free up your marketers to spend their time and energy on more high-level tasks.

Marketing automation can help you easily build emails and landing pages, score new leads for sales readiness, and access and understand your marketing metrics to accurately measure the success of your efforts. The best marketing automation software integrates with your PSA tools for centralized information you can access quickly.

With an automated CRM (customer relationship management) system, you’ll be able to set reminders for your sales team, alerting them to complete tasks like following up with prospects so they can move steadily through the sales funnel, and close deals on track.

Quote and Proposal Automation

Also known as a CPQ (configure, price, quote) tool, quote and proposal automation imbues your sales process with greater visibility and accountability. Think of it as a second brain for your sales team—empowering you to turn leads into happy new clients.

With pre-defined templates and pricing models, you’ll achieve a high level of consistency across your sales team. You’ll also save yourself the time of manual calculations, especially if you offer clients the same markup with each quote—and you’ll eliminate the risk of making a costly miscalculation.

Plus, pricing integrations allow you to find and incorporate hardware pricing in seconds, without taking the time to manually check different sources and pull the results into your proposal.

Document Your Automation

After successfully implementing IT automation software, your work isn’t done. It’s important to also document your automation campaign, for a number of reasons.

For one thing, documentation will help significantly when you need to train new team members. And if one of your staff takes a vacation or sick day, clear documentation ensures the rest of your team will be able to quickly fill in.

Documentation will also help your clients see the value of your services. As they assess whether your service is cost-effective or not, a deciding factor can be the efficiency with which you run your business. If you’re using industry-leading automation to run the most effective business possible, that gives you a competitive advantage. And if you’ve documented your automation from beginning to end, you’ll have a record of improvements and stats you can rely on to help inform clients of your company’s high standards.

It’s also important to be aware of the new capabilities automation brings. For instance, if you can tell a client that you proactively monitor for low disk space on their servers and workstations, and that you’ll automatically free wasted drive space to avoid system outages, you’ve already made an impression.

The main point to get across to clients is that your team is constantly looking for ways to provide more proactive and efficient IT solutions. When used and communicated effectively, automation can be key to achieving that element of trust that leads to delighted clients and fulfilled team members.


This article was provided by our service partner : Connectwise

L1TF

Another Intel Vulnerability Discovered: Hello L1TF!

Did you know security exploits have a lifecycle? Since Intel announced Meltdown and Spectre earlier this year, they have expanded their bug bounty program to support and accelerate the identification of new exploit methods. Through this process they discovered a new derivative of original vulnerabilities. The new L1 Terminal Fault (L1TF) vulnerability involves a security hole in the CPU’s L1 data cache, a small pool of memory within each processor core that helps determine what action it should take next. This type of exploit is similar to its predecessors and Intel, along with other chipmakers, are impacted.

Intel and other industry partners have not seen any reports of this method being used in real-world exploits.

Be Prepared

IT professionals can safeguard systems against potential exploits with mitigations that have already been deployed and are available today. Previously released updates are expected to lower risk of data exposure for non-virtualized operating systems, however virtual machines are more susceptible. Intel suggests additional safeguards for virtual environments, like turning off hyper-threading in some scenarios and enabling specific hypervisor core scheduling features. There are concerns around varied performance impact with these fixes however. Intel and other industry partners are working towards additional options for addressing mitigation efforts.

Now, more than ever, it’s important to adhere to security best practices like keeping systems up-to-date through patch management of operating systems and third-party applications.

LAPS

Microsoft LAPS deployment and configuration guide

If you haven’t come across the term “LAPS” before, you might wonder what it is. The acronym stands for the “Local Administrator Password Solution.” The idea behind LAPS is that it allows for a piece of software to generate a password for the local administrator and then store that password in plain text in an Active Directory (AD) attribute.

Storing passwords in plain text may sound counter to all good security practices, but because LAPS using Active Directory permissions, those passwords can only be seen by users that have been given the rights to see them or those in a group with rights to see them.

The main use case here shows that you can freely give out the local admin password to someone who is travelling and might have problems logging in using cached account credentials. You can then have LAPS request a new password the next time they want to talk to an on-site AD over a VPN.

The tool is also useful for applications that have an auto login capability. The recently released Windows Admin Center is a great example of this:

LAPS

To set up LAPS, there are a few things you will need to do to get it working properly.

  1. Download the LAPS MSI file
  2. Schema change
  3. Install the LAPS Group Policy files
  4. Assign permissions to groups
  5. Install the LAPS DLL

Download LAPS

LAPS comes as an MSI file, which you’ll need to download and install onto a client machine, you can download it from Microsoft.

Schema change

LAPS needs to add two attributes to Active Directory, the administrator password and the expiration time. Changing the schema requires the LAPS PowerShell component to be installed. When done, launch PowerShell and run the commands:

Import-module AdmPwd.PS

Update-AdmPwdADSchema

You need to run these commands while logged in to the network as a schema admin.

Install the LAPS group policy files

The group policy needs to be installed onto your AD servers. The *.admx file goes into the “windows\policydefintions” folder and the *.adml file goes into “\windows\policydefinitions\[language]”

LAPS 02

Once installed, you should see a LAPS section in GPMC under Computer configuration -> Policies -> Administrative Templates -> LAPS

LAPS 03

The four options are as follows:

Password settings — This lets you set the complexity of the password and how often it is required to be changed.

Name of administrator account to manage — This is only required if you rename the administrator to something else. If you do not rename the local administrator, then leave it as “not configured.”

Do not allow password expiration time longer than required by policy — On some occasions (e.g. if the machine is remote), the device may not be on the network when the password expiration time is up. In those cases, LAPS will wait to change the password. If you set this to FALSE, then the password will be changed regardless of it can talk to AD or not.

Enable local password management — Turns on the group policy (GPO) and allows the computer to push the password into Active Directory.

The only option that needs to be altered from “not configured” is the “Enable local admin password management,” which enables the LAPS policy. Without this setting, you can deploy a LAPS GPO to a client machine and it will not work.

Assign permissions to groups

Now that the schema has been extended, the LAPS group policy needs to be configured and permissions need to be allocated. The way I do this is to setup an organizational until (OU), where computers will get the LAPS policy and a read-only group and a read/write group.

Because LAPS is a push process, (i.e. because the LAPS client on the computer is the one to set the password and push it to AD) the computer’s SELF object in AD needs to have permission to write to AD.

The PowerShell command to allow this to happen is:

Set-AdmPwdComputerSelfPermission -OrgUnit <name of the OU to delegate permissions>

To allow helpdesk admins to read LAPS set passwords, we need to allow a group to have that permission. I always setup a “LAPS Password Readers” group in AD, as it makes future administration easier. I do that with this line of PowerShell:

Set-AdmPwdReadPasswordPermission -OrgUnit <name of the OU to delegate permissions> -AllowedPrincipals <users or groups>

The last group I set up is a “LAPS Admins” group. This group can tell LAPS to reset a password the next time that computer connects to AD. This is also set by PowerShell and the command to set it is:

Set-AdmPwdResetPasswordPermission -OrgUnit <name of the OU to delegate permissions> -AllowedPrincipals <users or groups>

LAPS 04

Once the necessary permissions have been set up, you can move computers into the LAPS enabled OU and install the LAPS DLL onto those machines.

LAPS DLL

Now that the OU and permissions have been set up, the admpwd.dll file needs to be installed onto all the machines in the OU that have the LAPS GPO assigned to it. There are two ways of doing this. First, you can simply select the admpwd dll extension from the LAPS MSI file.

LAPS 05


Or, you can copy the DLL (admpwd.dll) to a location on the path, such as “%windir%\system32”, and then issue a regsvr32.exe AdmPwd.dll command. This process can also be included into a GPO start-up script or a golden image for future deployments.

Now that the DLL has been installed on the client, a gpupdate /force should allow the locally installed DLL to do its job and push the password into AD for future retrieval.

Retrieving passwords is straight forward. If the user in question has at least the LAPS read permission, they can use the LAPS GUI to retrieve the password.

The LAPS GUI can be installed by running the setup process and ensuring that “Fat Client UI” is selected. Once installed, it can be run just by launching the “LAPS UI.” Once launched, just enter the name of the computer you want the local admin password for and, if the permissions are set up correctly, you will see the password displayed.

LAPS 06

If you do not, check that that the GPO is being applied and that the permissions are set for the OU where the user account is configured.

Troubleshooting

Like anything, LAPS can cause a few quirks. The two most common quirks I see include when staff with permissions cannot view passwords and client machines do not update the password as required.

The first thing to check is that the admpwd.dll file is installed and registered. Then, check that the GPO is applying to the server that you’re trying to change the local admin password on with the command gpresult /r. I always like to give applications like LAPS their own GPO to make this sort of troubleshooting much easier.

Next, check that the GPO is actually turned on. One of the oddities of LAPS is that it is perfectly possible to set everything in the GPO and assign the GPO to an OU, but it will not do anything unless the “Enable Local password management” option is enabled.

If there are still problems, double check that the permissions that have been assigned. LAPS won’t error out, but the LAPS GUI will just show a blank for the password, which could mean that either the password has not been set or that the permissions have not been set correctly.

You can double check permissions using the extended attribute section of windows permissions. You can access this by launching Active Directory users and computers -> Browse to the computer object -> Properties -> Security -> Advanced

LAPS 07

Double click on the security principal:

LAPS 08

Scroll down and check that both Read ms-Mcs-AdmPwd and Write ms-Mcs-admpwd are ticked.

In summary, LAPS works very well and it is a great tool for deployment to servers, especially laptops and the like. It can be a little tricky to get working, but it is certainly worth the time investment.

Incident Response

6 Steps to Build an Incident Response Plan

According to the Identity Theft Research Center, 2017 saw 1,579 data breaches—a record high, and an almost 45 percent increase from the previous year. Like many IT service providers, you’re probably getting desensitized to statistics like this. But you still have to face facts: organizations will experience a security incident sooner or later. What’s important is that you are prepared so that the impact doesn’t harm your customers or disrupt their business.

Although, there’s a new element that organizations—both large and small—have to worry about: the “what.” What will happen when I get hacked? What information will be stolen or exposed? What will the consequences look like?

While definitive answers to these questions are tough to pin down, the best way to survive a data breach is to preemptively build and implement an incident response plan. An incident response plan is a detailed document that helps organizations respond to and recover from potential—and, in some cases, inevitable—security incidents. As small- and medium-sized businesses turn to managed services providers (MSPs) like you for protection and guidance, use these six steps to build a solid incident response plan to ensure your clients can handle a breach quickly, efficiently, and with minimal damage.

Step 1: Prepare

The first phase of building an incident response plan is to define, analyze, identify, and prepare. How will your client define a security incident? For example, is an attempted attack an incident, or does the attacker need to be successful to warrant response? Next, analyze the company’s IT environment and determine which system components, services, and applications are the most critical to maintaining operations in the event of the incident you’ve defined. Similarly, identify what essential data will need to be protected in the event of an incident. What data exists and where is it stored? What’s its value, both to the business and to a potential intruder? When you understand the various layers and nuances of importance to your client’s IT systems, you will be better suited to prepare a templatized response plan so that data can be quickly recovered.

Treat the preparation phase as a risk assessment. Be realistic about the potential weak points within the client’s systems; any component that has the potential for failure needs to be addressed. By performing this assessment early on, you’ll ensure these systems are maintained and protected, and be able to allocate the necessary resources for response, both staff and equipment—which brings us to our next step.

Step 2: Build a Response Team

Now it’s time to assemble a response team—a group of specialists within your and/or your clients’ business. This team comprises the key people who will work to mitigate the immediate issues concerning a data breach, protecting the elements you’ve identified in step one, and responding to any consequences that spiral out of such an incident.

As an MSP, one of your key functions will sit between the technical aspects of incident resolution and communication between other partners. In an effort to be the virtual CISO (vCISO) for your clients’ businesses, you’ll likely play the role of Incident Response Manager who will oversee and coordinate the response from a technical and procedural perspective.

Pro Tip: For a list of internal and external members needed on a client’s incident response team, check out this in-depth guide.

Step 3: Outline Response Requirements and Resolution Times

From the team you assembled in step two, each member will play a role in detecting, responding, mitigating damage, and resolving the incident within a set time frame. These response and resolution times may vary depending on the type of incident and its level of severity. Regardless, you’ll want to establish these time frames up front to ensure everyone is on the same page.

Ask your clients: “What will we need to contain a breach in the short term and long term? How long can you afford to be out of commission?” The answers to these questions will help you outline the specific requirements and time frame required to respond to and resolve a security incident.

If you want to take this a step further, you can create quick response guides that outline the team’s required actions and associated response times. Document what steps need to be taken to correct the damage and to restore your clients’ systems to full operation in a timely manner. If you choose to provide these guides, we suggest printing them out for your clients in case of a complete network or systems failure.

Step 4: Establish a Disaster Recovery Strategy

When all else fails, you need a plan for disaster recovery. This is the process of restoring and returning affected systems, devices, and data back onto your client’s business environment.

A reliable backup and disaster recovery (BDR) solution can help maximize your clients’ chances of surviving a breach by enabling frequent backups and recovery processes to mitigate data loss and future damage. Planning for disaster recovery in an incident response plan can ensure a quick and optimal recovery point, while allowing you to troubleshoot issues and prevent them from occurring again. Not every security incident will lead to a disaster recovery scenario, but it’s certainly a good idea to have a BDR solution in place if it’s needed.

Step 5: Run a Fire Drill

Once you’ve completed these first four steps of building an incident response plan, it’s vital that you test it. Put your team through a practice “fire drill.” When your drill (or incident) kicks off, your communications tree should go into effect, starting with notifying the PR, legal, executive leadership, and other teams that there is an incident in play. As it progresses, the incident response manager will make periodic reports to the entire group of stakeholders to establish how you will notify your customers, regulators, partners, and law enforcement, if necessary. Remember that, depending on the client’s industry, notifying the authorities and/or forensics activities may be a legal requirement. It’s important that the response team takes this seriously, because it will help you identify what works and which areas need improvement to optimize your plan for a real scenario.

Step 6: Plan for Debriefing

Lastly, you should come full circle with a debriefing. During a real security incident, this step should focus on dealing with the aftermath and identifying areas for continuous improvement. Take is this opportunity for your team to tackle items such as filling out an incident report, completing a gap analysis with the full team,  and keeping tabs on post-incident activity.

No company wants to go through a data breach, but it’s essential to plan for one. With these six steps, you and your clients will be well-equipped to face disaster, handle it when it happens, and learn all that you can to adapt for the future.


This article was provided by our service partner : Webroot


Active Directory

Three Active Directory Automation Scripting Tips Using PowerShell

Active Directory is one of the most common products I see being automated. After all, it’s the perfect candidate. How many times do new users have to be created, group memberships changed, or new computers added? Employees are coming and going all the time, and the actions to perform these tasks are the same—every time.

Microsoft® has an Active Directory (AD) PowerShell module that allows anyone to manage AD objects and write scripts to tie various tasks together. However, with PowerShell expertise, we can create scripts that go past just finding users and groups. We can automate any task you can think of in AD.

Find All Effective Members of a Group

AD has a great feature that allows you to add groups to other groups. This cuts down on the number of repeated group assignments you have to make, and makes AD much cleaner. However, when navigating to a group in the AD Graphical User Interface (GUI), you can only see the members in that immediate group. You may see others, but you’ll have to look at the members of those groups over and over again.

It can become a pain when you want to see all of the affected user accounts, but we can solve that using a PowerShell code and a recursive function.

To find members of a group with PowerShell, use the Get-AdGroupMember cmdlet. This command returns all members in just that group. However, a property on each of those members is an AD attribute indicating if it’s a user, a group, etc. That way, we know what kind of object it is. Knowing this, we can build code to look at each of those members, check to see if they’re a group, and if so, run Get-AdGroupMember again. If not, we return the member.

We need to use a recursive function—a function that calls itself, forcing it to find user accounts nested deep inside of various groups. By using a recursive function like this, a user can be nested ten groups deep, and we’ll still find it.

An example of how this can be done is below. This function can be called via Get-NestedGroupMember -Group MyGroup.

function Get-NestedGroupMember {
[CmdletBinding()]
param (
[Parameter(Mandatory)]
[string]$Group
)

## Find all members in the group specified
$members = Get-ADGroupMember -Identity $Group
foreach ($member in $members) {
## If any member in that group is another group just call this function again
if ($member.objectClass -eq 'group') {
Get-NestedGroupMember -Group $member.Name
} else { ## otherwise, just output the non-group object (probably a user account)
$member.Name
}
}
}
Easily Find Inactive Group Policy Objects

The next tip is finding inactive Group Policy Objects (GPOs). Especially in large organizations, GPOs can get out of hand and run wild unless controlled. Sometimes there ends up being dozens of GPOs created that aren’t doing anything at all. Rather than picking these out one at a time via the GUI, we can build a simple script to find them all in one shot.

There are two ways to define an inactive GPO. This GPO could have all of its settings disabled, or it could not be linked to an organizational unit. We can create a script to find both of these types. First, we’ll pull all of the GPOs in the environment:

$allGpos = Get-Gpo -All

Once we have them all, we can then filter those GPOs by the ones that have all settings disabled:

$disabledGpos = $allGpos | Where-Object { $_.GpoStatus -eq 'AllSettingsDisabled' }
foreach ($oGpo in $disabledGpos) {
[pscustomobject]@{
Name = $oGpo.DisplayName
Status = 'Disabled'
}
}

Next, we can find all GPOs that aren’t linked to an organizational unit. This is a little trickier, but nothing we can’t handle using the code below:

## Create an empty array
$unlinkedGpos = @()
foreach ($oGpo in $allGpos) {
## Gather up all settings in the GPO
[xml]$oGpoReport = Get-GPOReport -Guid $oGpo.ID -ReportType xml;
## Only return the GPOs that don't have a LinksTo property meaning they aren't linked to an OU
if ('LinksTo' -notin $oGpoReport.GPO.PSObject.Properties.Name) {
[pscustomobject]@{
Name = $oGpo.DisplayName
Status = 'Unlinked'
}
}
}

This script will return a list of GPOs that look like this:

Name Status
---- ------
GPO1 Unlinked
GPO2 Disabled
GPO3 Disabled
Find How Long Ago a User Reset Their Password

For my last tip, let’s figure out how long ago a user’s password was set. More specifically, let’s write a small script that will allow us to find only those users that have had their password set within a configurable amount of days.

This small script uses the Get-AdUser command and filters the users returned using the Where-Object command. In this example, we’re looking at the passwordlastset attribute for each user that is greater than 30 days ago.

$daysOld = 30
$today = Get-Date
Get-AdUser -Filter { enabled -eq $true } -Properties passwordlastset | Where-Object 
{ $_.passwordlastset -gt $today.AddDays(-$daysOld) }
Summary

We’ve just skimmed the surface on what’s possible when automating with PowerShell and Active Directory. By leveraging Microsoft’s Active Directory module and stringing together commands with PowerShell, we’re able to come up with some interesting scripts.